Hey, Would you like to work at Home ?? Just click here No need to pay, just register free and activate your account and get data Entry Work at your Home.

Wednesday, February 6, 2008

URL Rewriting

The Apache server’s mod_rewrite module gives you the ability to transparently redirect one URL to another, without the user’s knowledge. This opens up all sorts of possibilities, from simply redirecting old URLs to new addresses, to cleaning up the ‘dirty’ URLs coming from a poor publishing system — giving you URLs that are friendlier to both readers and search engines.


An Introduction to Rewriting


Readable URLs are nice. A well designed website will have a logical file system layout, with smart folder and file names, and as many implementation details left out as possible. In the most well designed sites, readers can guess at filenames with a high level of success.


However, there are some cases when the best possible information design can’t stop your site’s URLs from being nigh-on impossible to use. For instance, you may be using a Content Management System that serves out URLs that look something like


http://www.example.com/viewcatalog.asp?category=hats&prodID=53


This is a horrible URL, but it and its brethren are becoming increasingly prevalent in these days of dynamically-generated pages. There are a number of problems with an URL of this kind:


  • It exposes the underlying technology of the website (in this case ASP). This can give potential hackers clues as to what type of data they should send along with the query string to perform a ‘front-door’ attack on the site. Information like this shouldn’t be given away if you can help it.


    Even if you’re not overly concerned with the security of your site, the technology you’re using is at best irrelevant — and at worst a source of confusion — to your readers, so it should be hidden from them if possible.


    Also, if at some point in the future you decide to change the language that your site is based on (to » PHP, for instance); all your old URLs will stop working. This is a pretty serious problem, as anyone who has tackled a full-on site rewrite will attest.


  • The URL is littered with awkward punctuation, like the question mark and ampersand. Those & characters, in particular, are problematic because if another webmaster links to this page using that URL, the un-escaped ampersands will mess up their XHTML conformance.

  • Some search engines won’t index pages which they think are generated dynamically. They’ll see that question mark in the URL and just turn their asses around.


Luckily, using rewriting, we can clean up this URL to something far more manageable. For example, we could map it to


http://www.example.com/catalog/hats/53/


Much better. This URL is more logical, readable and memorable, and will be picked up by all search engines. The faux-directories are short and descriptive. Importantly, it looks more permanent.


To use mod_rewrite, you supply it with the link text you want the server to match, and the real URLs that these URLs will be redirected to. The URLs to be matched can be straight file addresses, which will match one file, or they can be regular expressions, which will match many files.


Basic Rewriting


Some servers will not have » mod_rewrite enabled by default. As long as the » module is present in the installation, you can enable it simply by starting a .htaccess file with the command


RewriteEngine on


Put this .htaccess file in your root so that rewriting is enabled throughout your site. You only need to write this line once per .htaccess file.


Basic Redirects


We’ll start off with a straight redirect; as if you had moved a file to a new location and want all links to the old location to be forwarded to the new location. Though you shouldn’t really ever » move a file once it has been placed on the web; at least when you simply have to, you can do your best to stop any old links from breaking.


RewriteEngine on

RewriteRule ^old\.html$ new.html


Though this is the simplest example possible, it may throw a few people off. The structure of the ‘old’ URL is the only difficult part in this RewriteRule. There are three special characters in there.


  • The caret, ^, signifies the start of an URL, under the current directory. This directory is whatever directory the .htaccess file is in. You’ll start almost all matches with a caret.

  • The dollar sign, $, signifies the end of the string to be matched. You should add this in to stop your rules matching the first part of longer URLs.

  • The period or dot before the file extension is a special character in regular expressions, and would mean something special if we didn’t escape it with the backslash, which tells Apache to treat it as a normal character.


So, this rule will make your server transparently redirect from old.html to the new.html page. Your reader will have no idea that it happened, and it’s pretty much instantaneous.


Forcing New Requests


Sometimes you do want your readers to know a redirect has occurred, and can do this by forcing a new HTTP request for the new page. This will make the browser load up the new page as if it was the page originally requested, and the location bar will change to show the URL of the new page. All you need to do is turn on the [R] flag, by appending it to the rule:


RewriteRule ^old\.html$ new.html [R]


Using Regular Expressions


Now we get on to the really useful stuff. The power of mod_rewrite comes at the expense of complexity. If this is your first encounter with regular expressions, you may find them to be a tough nut to crack, but the options they afford you are well worth the slog. I’ll be providing plenty of examples to guide you through the basics here.


Using regular expressions you can have your rules matching a set of URLs at a time, and mass-redirect them to their actual pages. Take this rule;


RewriteRule ^products/([0-9][0-9])/$ /productinfo.php?prodID=$1


This will match any URLs that start with ‘products/’, followed by any two digits, followed by a forward slash. For example, this rule will match an URL like products/12/ or products/99/, and redirect it to the PHP page.


The parts in square brackets are called ranges. In this case we’re allowing anything in the range 0-9, which is any digit. Other ranges would be [A-Z], which is any uppercase letter; [a-z], any lowercase letter; and [A-Za-z], any letter in either case.


We have encased the regular expression part of the URL in parentheses, because we want to store whatever value was found here for later use. In this case we’re sending this value to a PHP page as an argument. Once we have a value in parentheses we can use it through what’s called a back-reference. Each of the parts you’ve placed in parentheses are given an index, starting with one. So, the first back-reference is $1, the third is $3 etc.


Thus, once the redirect is done, the page loaded in the readers’ browser will be something like productinfo.php?prodID=12 or something similar. Of course, we’re keeping this true URL secret from the reader, because it likely ain’t the prettiest thing they’ll see all day.


Multiple Redirects


If your site visitor had entered something like products/12, the rule above won’t do a redirect, as the slash at the end is missing. To promote good URL writing, we’ll take care of this by doing a direct redirect to the same URL with the slash appended.


RewriteRule ^products/([0-9][0-9])$ /products/$1/ [R]


Multiple redirects in the same .htaccess file can be applied in sequence, which is what we’re doing here. This rule is added before the one we did above, like so:


RewriteRule ^products/([0-9][0-9])$ /products/$1/ [R]

RewriteRule ^products/([0-9][0-9])/$ /productinfo.php?prodID=$1


Thus, if the user types in the URL products/12, our first rule kicks in, rewriting the URL to include the trailing slash, and doing a new request for products/12/ so the user can see that we likes our trailing slashes around here. Then the second rule has something to match, and transparently redirects this URL to productinfo.php?prodID=12. Slick.


Match Modifiers


You can expand your regular expression patterns by adding some modifier characters, which allow you to match URLs with an indefinite number of characters. In our examples above, we were only allowing two numbers after products. This isn’t the most expandable solution, as if the shop ever grew beyond these initial confines of 99 products and created the URL productinfo.php?prodID=100, our rules would cease to match this URL.


So, instead of hard-coding a set number of digits to look for, we’ll work in some room to grow by allowing any number of characters to be entered. The rule below does just that:


RewriteRule ^products/([0-9]+)$ /products/$1/ [R]


Note the plus sign (+) that has snuck in there. This modifier changes whatever comes directly before it, by saying ‘one or more of the preceding character or range.’ In this case it means that the rule will match any URL that starts with products/ and ends with at least one digit. So this’ll match both products/1 and products/1000.


Other match modifiers that can be used in the same way are the asterisk, *, which means ‘zero or more of the preceding character or range’, and the question mark, ?, which means ‘zero or only one of the preceding character or range.’


Adding Guessable URLs


Using these simple commands you can set up a slew of ‘shortcut URLs’ that you think visitors will likely try to enter to get to pages they know exist on your site. For example, I’d imagine a lot of visitors try jumping straight into our stylesheets section by typing the URL http://www.yourhtmlsource.com/css/. We can catch these cases, and hopefully alert the reader to the correct address by updating their location bar once the redirect is done with these lines:


RewriteRule ^css(/)?$ /stylesheets/ [R]


The simple regular expression in this rule allows it to match the css URL with or without a trailing slash. The question mark means ‘zero or one of the preceding character or range’ — in other words either yourhtmlsource.com/css or yourhtmlsource.com/css/ will both be taken care of by this one rule.


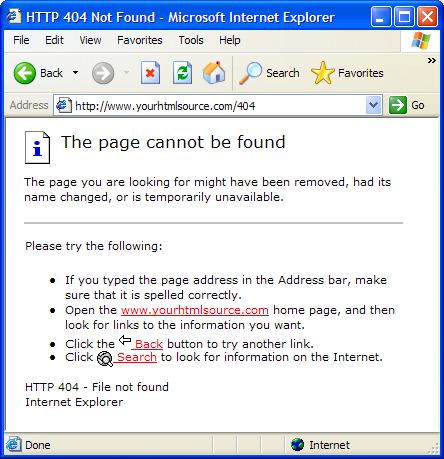
This approach means less confusing 404 errors for your readers, and a site that seems to run a whole lot smoother all ’round.


Custom 404 Error

Everyone’s encountered the frustrating 404 error page. You follow a link, looking forward to the joy waiting for you on the other side, when BAM! you get an error because the page you were looking for doesn’t exist. Maybe it was moved, maybe it was never there in the first place, but the fact is you’re left sitting there with an unhelpful error message and nowhere to go.

The best sites have found a way to lessen the aggravation by customising their error code with a page that apologises for the mess up and offers some solutions to rectify the problem. If you want to show your readers that you care, read on...


Check it out


First off before you do anything else you should make sure that customising error codes in this way is allowed or even possible. Some webhosts (including most of the popular free ones I would imagine) will not permit this sort of tampering because it might mess something else important up. This is generally thought of as an “advanced” modification. Find an FAQ or email the people in charge of your server and ask if you can set it up. If you have your own domain, you shouldn’t have any restrictions of this kind.


The .htaccess file


Your .htaccess text file is the special file that sets up the deal for you. It can contain all sorts of directives for the Apache server. If you’re not using an Apache-based server, you’ll have to read your server’s manual on how to do it.


Look in your root directory, the place where your homepage is, for this file (.htaccess). If it’s not there don’t fret, you can just create it afresh and it won’t make any difference. When doing so, just make an empty text file in Notepad or whatever, and make sure you start the filename with a dot — it’s vital. Starting a filename with a dot makes it a hidden file in Unix.


sourcetip: You may have problems creating a filename that starts with a dot. If your operating system won’t let you, upload the file and rename it through your FTP program once it’s online.


For now, just save a basic HTML page with the words “404 error” in it so that we can test this. I’ll show you how to make a useful custom 404 error page later on.


Edit it


Now you need to point .htaccess to your custom page. Add this line to the file (edit it with a text editor like Notepad):


ErrorDocument 404 /404page.html


Make sure it’s all on one line. Start the file path with a slash, which tells the server to start looking in your root directory (where your homepage is), and follow the path you specify. For example,


ErrorDocument 404 /misc/404page.html


This will load the file 404page.html in your misc directory.


sourcetip: Make sure you don’t specify a full URL to your 404 page, as in something like “http://www.example.com/404page.html”. This will cause your server to return the wrong response code, and will actually make it seem like the page was found correctly.

If you specify the path to your file as I have in the tutorial (relative to the root, like “/404page.html”), you won’t have these problems. It’s also a good idea to add the code <meta name="robots" content="noindex"> to the <head> section of your 404 page, so that search engine robots don’t add it to their indexes.


Now upload your .htaccess file to your root directory, and your 404 page to the address you specified, and you’re ready.


Then let’s turn it on!


This step may not be necessary, but if you’re unlucky you’ll have to tell your server to activate this feature. On a Unix server, this may already be on, but if not you’ll have to connect to your server and type chmod 644 .htaccess at the prompt. This sets the file permissions. You can change .htaccess’ permissions through the interface in most FTP programs too. If you have no idea what that meant, contact your server guys again and ask them to sort it out for you.


What should I use it for?


A good 404 error page must have a number of things to be truly useful — it’s not much good simply putting up a message saying “we apologise for messing up so very horribly.”


  • Your 404 page should look similar to the rest of your website, so that visitors know that they’re still on part of your site.

  • Explain the error that has occured, and perhaps describe common reasons for the error (mistyped URLs, outdated content etc.). Use clear language and don’t ramble. Since it’s such a well-known error code, including the number “404” in this summary will get the message across quickly.

  • If your site has a search function, include a search box.

  • If you have an index, add a link to it, and definitely link back to your homepage.

  • Include an email link so that visitors can report the problem. Don’t expect a lot of them to take the time to do it, but some will, and it again enforces the point that you care that they’ve had a problem.


Overall, just make sure you motivate your reader not to lose all faith in your site, and give them options as to where to go next.


sourcetip: Since your 404 page might be served up from any subdirectory of your site, make sure all links and image sources are defined absolutely. For instance, use href="/index.html" instead of href="../../index.html".


Even if you don’t allow many links to go broken throughout your own site, mistakes will occur. Visitors will mistype an address, or follow a mistyped link from another site.


Studies have shown that if you recover well from an error by serving a useful error page, visitors are actually happier with their experience with a website than they would’ve been if nothing went wrong. Don’t ask me how exactly that works, but I saw it in a book, so there you go.


sourcetip: Internet Explorer has a lightly-documented “feature” that stops it from serving any custom 404 error page that is less than 512 bytes long. Your visitors will instead be sent to IE’s own 404 page (screenshot), which is generic and suggests they use an MSN search to “look for information on the Internet.” That’s one way to lose visitors! Make sure your custom 404 error page is over this limit — about 10 full lines of text and HTML should be enough.


Password Protection

In general, all websites are freely viewable by anybody who wants to see them. Requiring a username and password to access various sensitive areas of your site allows you to restrict access to only a chosen few people who know the secret codes. In this tutorial I’ll present a method to secure a directory of documents by using a special Apache server configuration file.

Password protection through JavaScript


Before we get into this section, I present a minor caveat: using JavaScript to secure your website is an absolutely rubbish way to keep unwanted visitors out. If I encounter a site that tries to block access using JavaScript, it is a simple matter of temporarily disabling JavaScript in my browser to circumvent the dialog box. With no JavaScript, the link to the protected area of the site will work like any other normal link, and I will be able to roam free through the heretofore unseen depths of the site.


On top of this rather large chink in the armour, those pages will also be automatically indexed by search engines, leaving the private information accessible simply by searching for it.


So, given that any halfway competent infiltrator will easily be able to access a site secured only through JavaScript, I am not going to describe the method to do it, as there are significantly more secure ways to protect a section of your site that are much safer to use.


Using a .htaccess file


A “.htaccess file”, which you may have encountered before if you’ve set up your own 404 error, is a special configuration file for the Apache web server. It is just a text file with a special name that contains rules that your server will apply before it sends any files to a viewer of your site. These rules can change the URL of a page, create custom error messages, or in this case require a valid username and password to gain access to a certain area of the site.


These configuration files work on a directory basis, so if your site is at www.example.com and you place the .htaccess file in the root directory (where your index.html homepage is), the entire site will be off-limits and all visitors will need a password to view anything. This is generally not what you want, and so you will create a .htaccess file within a certain directory.


When you set up authorisation for a certain directory, that directory, all of its files, and any directories within it are all protected by this one file. You can have a multiple different .htaccess file in multiple directories in your site if necessary.


To create the file, open your text editor and save a blank file as “.htaccess” in the directory you want to protect, noting that the filename starts with a dot. Windows users may find that they are told they can’t start a filename with a dot. If you get this error, use your FTP program to create the .htaccess file on your server and edit it there instead.


Setting up Authorisation


Now that we have our all-important .htaccess file, we’ll need to add the authorisation rules to it. Add these lines to your file:


AuthName "Section name"

AuthType Basic

AuthUserFile /.htpasswd

Require valid-user


Change the “Section name” to whatever the secure section of your website is called. This value will be placed in the dialog box when a user is asked for their details, so try to make it descriptive so that they know what they’re being asked for. The dialog looks like this in Firefox:


Firefox .htaccess authentication dialog box


If you save that file now and try to access this part of your website, you should be presented with a dialog box in your browser asking you for your username and password. Of course, there is no right answer yet because we haven’t set up any users. If you press Cancel in the dialog you will be given the standard “401 Authorization Required” error response code. This is what everyone will see if they log in incorrectly.


The .htpasswd file


To add valid users to our authentication scheme, we use a second file called a .htpasswd file. This file will hold a list of usernames and passwords. Because it contains potentially sensitive information, you should store it in a place that’s impossible to access from the web. This means putting it somewhere else on the server outside of your “web” or “www” directory where your website files are stored. Your hosting company will be able to help you place this file securely so that no ne’er-do-wells can access it.


Once you have secured this file, change the line in .htaccess that points to it. It’ll then look something like this:


AuthUserFile /usr/home/ross/.htpasswd


Finally, we just need to start adding valid users to this file. For added security, the passwords of your users aren’t stored in plain text in the .htpasswd file — they’re encrypted so that they can’t be read by a user snooping around the server. To add a user called “rustyleroo” with the password “flummox45”, we would add this line to the file:


rustyleroo:E2JbzVpOLlE6Y


As you can see, the password has been obfuscated into a strange form of gobbledegook. I derived this value (technically called a “hash”) by running the original password through an encryption program. There are lots of these available online (this one for example). You can add new users by adding new lines to this file, all in the form username:encryptedpassword.


Accessing the protected section


Now when you reload a file behind the authorisation wall, you enter a username and password into the dialog box. The server will encrypt this password again, and compare it to the encrypted version stored in the file to see if they match. If they do, you will be allowed to view the rest of the protected files as normal.


You can send the username and password to people in this format:


http://username:password@www.example.com/directory/


Clicking a link like that will log you in as the user at the start of the URL. Of course, you need to make sure that only the intended person gets their hands on this information.


Finally, to remove any password restrictions on your files, just delete the .htaccess file.

Server Response Codes

Every time a page is requested your server reports how the process of finding and sending the file to the user went. By analysing the server response codes that your server is spitting out, you can diagnose various problems with your site, as well as learning much about the surfing habits of your readers.


Headers


Whenever a user sends a request to a server, a process called a ‘handshake’ begins where the server and your computer communicate and the server makes sure it can accommodate what your user has requested of it. This means being able to make the connection between the two computers and then completing the transfer of data.


Headers are short fragments of text which are generated by servers to hold information pertaining to each transfer as it occurs. There are four kinds of headers:


General

This holds information about the client (user), the server itself and the protocol being used (like http or ftp).

Entity

This holds information about the data that is being transferred.

Request

This holds information about the allowable formats and parameters for the transfer.

Response

This is sent out by the server at the end of a transfer, and includes detailed information, in code form, on the outcome of the transfer.


The Response Codes


As a web surfer you've probably become familiar with the dreaded 404 error message (and possibly made your own), which signifies a ‘page not found’ error. That's the most well-known server response code, but there are many more. These numerical codes are grouped — the low numbers are generally ‘good’, and operate silently, while anything over 400 is definitely bad news and will be reported to the user in the form of an error message.


Code Explanation
100-199 Silent Response Codes that signify that a request has been received and is currently being processed.
100 The request has been completed and the rest of the process can continue.
101 The user's request to switch protocols (like from FTP to HTTP) was accepted.
200-299 Silent codes that confirm that requests have completed successfully.
200 Ok — the file which the client requested is available for transfer. This is the response code you want to see all of your users receiving.
201 When new pages are created by posted form data or by a CGI process, this is confirmation that it worked.
202 The client's request was accepted, though not yet processed.
203 The information contained in the entity header is not from the original site, but from a third party server.
204 If you click a link which has no target URL, this response is elicited by the server. It's silent and doesn't warn the user about anything.
205 This allows the server to reset any content returned by a CGI.
206 Partial content — the requested file wasn't downloaded entirely. This is returned when the user presses the stop button before a page is loaded, for example.
300-399 A redirection is occurring from the original request.
300 The requested address refers to more than one file. Depending on how the server is configured, you get an error or a choice of which page you want.
301 Moved Permanently — if the server is set up properly it will automatically redirect the reader to the new location of the file.
302 Found — page has been moved temporarily, and the new URL is available. You should be sent there by the server.
303 This is a "see other" SRC. Data is somewhere else and the GET method is used to retrieve it.
304 Not Modified — if the request header includes an 'if modified since' parameter, this code will be returned if the file has not changed since that date. Search engine robots may generate a lot of these.
400-499 Request is incomplete for some reason.
400 Bad Request — there is a syntax error in the request, and it is denied.
401 The request header did not contain the necessary authentication codes, and the client is denied access.
402 Payment is required. This code is not yet in operation.
403 Forbidden — the client is not allowed to see a certain file. This is also returned at times when the server doesn't want any more visitors.
404 Document not found — the requested file was not found on the server. Possibly because it was deleted, or never existed before. Often caused by misspellings of URLs.
405 The method you are using to access the file is not allowed.
406 The requested file exists but cannot be used as the client system doesn't understand the format the file is configured for.
407 The request must be authorised before it can take place.
408 Request Timeout — the server took longer than its allowed time to process the request. Often caused by heavy net traffic.
409 Too many concurrent requests for a single file.
410 The file used to be in this position, but is there no longer.
411 The request is missing its Content-Length header.
412 A certain configuration is required for this file to be delivered, but the client has not set this up.
413 The requested file was too big to process.
414 The address you entered was overly long for the server.
415 The filetype of the request is unsupported.
500-599 Errors have occurred in the server itself.
500 Internal Server Error — nasty response that is usually caused by a problem in your Perl code when a CGI program is run.
501 The request cannot be carried out by the server.
502 Bad Gateway — the server you're trying to reach is sending back errors.
503 Temporarily Unavailable — the service or file that is being requested is not currently available.
504 The gateway has timed out. Like the 408 timeout error, but this one occurs at the gateway of the server.
505 The HTTP protocol you are asking for is not supported.


Deal with Bad Robots and Pesky Spambots

Using the Mod Rewrite URL Rewriting Engine to Deal with Bad Robots and Pesky Spambots


One of the greatest features of the APACHE server is Mod Rewrite. This optional module allows you to control URL access in an almost infinite manner of ways. Our task at hand though is to protect our server from wasteful accesses that for a variety of reasons can drag the server to its knees.


The problems with many robots and spambots can be broken down into a few areas:


  • They either ignore the robots.txt instructions file, or attempt to exploit it to find otherwise unlinked directories.


  • Due to programming errors, they can get caught in loops, attempting to access files that do not exist.


  • If they are what is called multi-threaded, they can launch an almost unlimited number of concurrent connections to your site creating a serious system load.


  • Do you really feel like paying for bandwidth when all somebody is doing is trying to get e-mail addresses out of your pages?


There was a time when I was using a browser detection in my Server Side Includes that would basically spill about 200K of garbage down the throat of any spambot that came our way. Okay, I confess that revenge felt good, but when I thought it over I realized that I was placing more strain on our server, and by providing a huge list of bogus e-mail addresses, was placing a strain on the SMTP server that the spammer would eventually hijack. It was then that I decided to start using the RewriteEngine module.

Any visiting spambot or what I feel is a problem robot is directed to:


problem.html

In this page, I explain why they ended up where they did. In the case of people attempting to capture the site for off-line viewing, I try to be of assistance. If somebody thinks enough of BNB to save it, I owe them something in return.

The elegance of this solution is that the offending 'bot never sees anything but that one small page. No matter what URL they request from our site, that is the only page they will ever see. It is handled at the server level and cannot be bypassed.


NOTE: In order to use this feature of the Apache Server, you must make sure that the server was installed with the mod_rewrite.o file. This is done by adding the line to the Configuration file before compiling the server.
AddModule modules/standard/mod_rewrite.o


THIS SOUNDS GREAT! HOW DO I DO IT?


As of this writing, here is my little rewrite instruction code:


RewriteEngine  on
RewriteCond %{HTTP_USER_AGENT} ^EmailSiphon [OR]
RewriteCond %{HTTP_USER_AGENT} ^EmailWolf [OR]
RewriteCond %{HTTP_USER_AGENT} ^ExtractorPro [OR]
RewriteCond %{HTTP_USER_AGENT} ^CherryPicker [OR]
RewriteCond %{HTTP_USER_AGENT} ^NICErsPRO [OR]
RewriteCond %{HTTP_USER_AGENT} ^Teleport*28 [OR]
RewriteCond %{HTTP_USER_AGENT} ^EmailCollector
RewriteRule ^.*$ problem.html [L]

What this code basically says, is that if the HTTP_USER_AGENT from the beginning matches any of the listed values, to redirect them to the problem.html page.

There is a performance penalty for placing RewriteEngine directives in your .htaccess file, but I recommend doing so for the following reasons.


Since you are most likely not going to be dealing with a lot of spiders at once, and since they are not going to get anyplace anyway, what is called the Chicken & the Egg Problem is not going to be much of an issue. As you identify new 'bots, you can add them to the list without having to restart your server.


Note: Do NOT place any links to your site on the page the spiders or spambots are being redirected to! You can also protect individual directories by creating an .htaccess file in the directory you would to forbid access to.

Tuesday, February 5, 2008

Load Balancing


Description:


Suppose we want to load balance the traffic to www.foo.com over www[0-5].foo.com (a total of 6 servers). How can this be done?


Solution:


There are a lot of possible solutions for this problem. We will discuss first a commonly known DNS-based variant and then the special one with mod_rewrite:


  1. DNS Round-Robin

    The simplest method for load-balancing is to use the DNS round-robin feature of BIND. Here you just configure www[0-9].foo.com as usual in your DNS with A(address) records, e.g.


    www0   IN  A       1.2.3.1  www1   IN  A       1.2.3.2  www2   IN  A       1.2.3.3  www3   IN  A       1.2.3.4  www4   IN  A       1.2.3.5  www5   IN  A       1.2.3.6  


    Then you additionally add the following entry:


    www    IN  CNAME   www0.foo.com.         IN  CNAME   www1.foo.com.         IN  CNAME   www2.foo.com.         IN  CNAME   www3.foo.com.         IN  CNAME   www4.foo.com.         IN  CNAME   www5.foo.com.         IN  CNAME   www6.foo.com.  


    Notice that this seems wrong, but is actually an intended feature of BIND and can be used in this way. However, now when www.foo.com gets resolved, BIND gives out www0-www6 - but in a slightly permutated/rotated order every time. This way the clients are spread over the various servers. But notice that this not a perfect load balancing scheme, because DNS resolve information gets cached by the other nameservers on the net, so once a client has resolved www.foo.com to a particular wwwN.foo.com, all subsequent requests also go to this particular name wwwN.foo.com. But the final result is ok, because the total sum of the requests are really spread over the various webservers.


  2. DNS Load-Balancing

    A sophisticated DNS-based method for load-balancing is to use the program lbnamed which can be found at http://www.stanford.edu/~schemers/docs/lbnamed/lbnamed.html. It is a Perl 5 program in conjunction with auxilliary tools which provides a real load-balancing for DNS.


  3. Proxy Throughput Round-Robin

    In this variant we use mod_rewrite and its proxy throughput feature. First we dedicate www0.foo.com to be actually www.foo.com by using a single


    www    IN  CNAME   www0.foo.com.  


    entry in the DNS. Then we convert www0.foo.com to a proxy-only server, i.e. we configure this machine so all arriving URLs are just pushed through the internal proxy to one of the 5 other servers (www1-www5). To accomplish this we first establish a ruleset which contacts a load balancing script lb.pl for all URLs.


    RewriteEngine on  RewriteMap    lb      prg:/path/to/lb.pl  RewriteRule   ^/(.+)$ ${lb:$1}           [P,L]  


    Then we write lb.pl:


    #!/path/to/perl  ##  ##  lb.pl -- load balancing script  ##    $| = 1;    $name   = "www";     # the hostname base  $first  = 1;         # the first server (not 0 here, because 0 is myself)  $last   = 5;         # the last server in the round-robin  $domain = "foo.dom"; # the domainname    $cnt = 0;  while (<STDIN>) {      $cnt = (($cnt+1) % ($last+1-$first));      $server = sprintf("%s%d.%s", $name, $cnt+$first, $domain);      print "http://$server/$_";  }    ##EOF##  


    A last notice: Why is this useful? Seems like www0.foo.com still is overloaded? The answer is yes, it is overloaded, but with plain proxy throughput requests, only! All SSI, CGI, ePerl, etc. processing is completely done on the other machines. This is the essential point.


  4. Hardware/TCP Round-Robin

    There is a hardware solution available, too. Cisco has a beast called LocalDirector which does a load balancing at the TCP/IP level. Actually this is some sort of a circuit level gateway in front of a webcluster. If you have enough money and really need a solution with high performance, use this one.


Your Ad Here